Outer Shield Roofing A Comprehensive Guide
Outer Shield roofing represents a significant advancement in home protection. This guide dives into the details of this innovative roofing system, exploring its various features, installation processes, maintenance needs, and overall cost-effectiveness. We’ll compare it to traditional roofing options, discuss environmental considerations, and help you choose the right contractor for your project. Get ready to learn everything you need to know about making Outer Shield roofing your best choice!
From the diverse material options available—like durable metals and resilient composites—to the long-term cost savings and aesthetic versatility, Outer Shield roofing offers a compelling alternative to traditional roofing solutions. This guide aims to equip you with the knowledge to confidently navigate the decision-making process, ensuring your home is protected for years to come.
Product Overview
Source: com.au
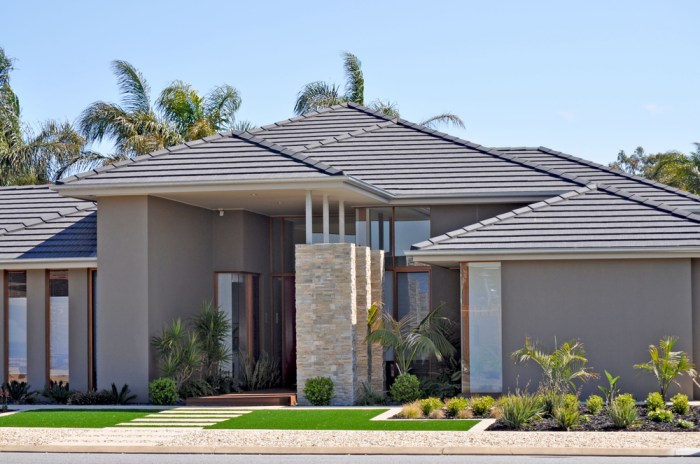
Outer Shield Roofing systems offer a durable and long-lasting solution for protecting your home or business from the elements. We pride ourselves on providing superior protection and peace of mind, knowing your investment is safeguarded for years to come. Our systems are designed for both aesthetic appeal and exceptional performance.
Outer Shield Roofing prioritizes quality materials and advanced installation techniques to ensure a superior roofing system that stands the test of time. The result is a roof that not only looks great but also provides exceptional protection against harsh weather conditions, including heavy rain, snow, and strong winds. Our commitment to innovation ensures that our roofing solutions remain at the forefront of the industry.
Outer Shield Roofing Materials
Outer Shield offers a variety of roofing materials to suit diverse architectural styles and budgets. Choosing the right material depends on your specific needs and preferences, considering factors like climate, aesthetic preferences, and budget.
- Metal Roofing: Our metal roofing options, including steel and aluminum, are known for their exceptional durability, longevity, and resistance to fire and extreme weather. They are also highly reflective, helping to keep your home cooler in the summer. Expect a sleek, modern look with a wide range of color options.
- Composite Roofing: Our composite roofing systems blend the best features of traditional materials, offering a durable, aesthetically pleasing, and cost-effective solution. These roofs often mimic the appearance of natural materials like slate or tile, while offering superior performance and lower maintenance requirements.
Comparison with Other Roofing Options
Understanding the differences between Outer Shield roofing and other common options helps you make an informed decision. The following table provides a comparison based on typical scenarios. Keep in mind that actual costs and lifespans can vary depending on specific materials, installation, and local conditions.
| Material | Lifespan (Years) | Cost (Relative) | Maintenance |
|---|---|---|---|
| Outer Shield Metal | 50+ | High | Low |
| Outer Shield Composite | 30-50 | Medium | Low |
| Asphalt Shingles | 15-30 | Low | Medium |
| Clay Tile | 50+ | High | Low |
Installation Process

Source: everythingexteriorroofing.com
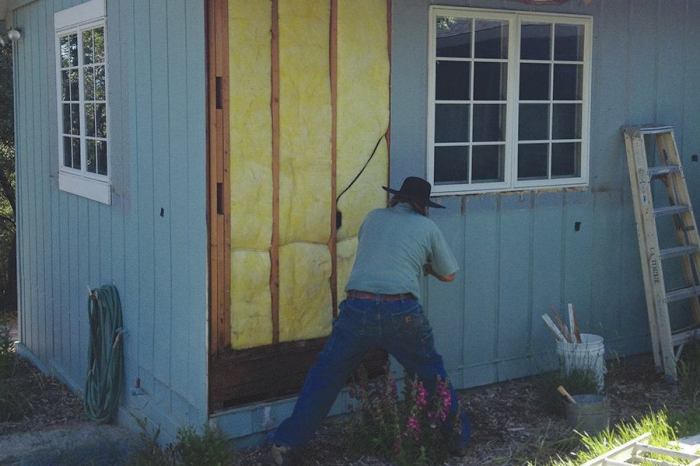
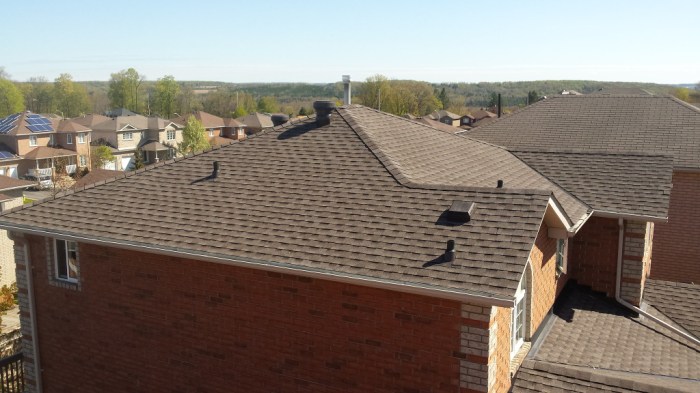
Getting your Outer Shield roof installed is a straightforward process, but proper execution is key to a long-lasting, leak-free roof. This section details the steps involved, the necessary tools, and best practices to ensure a successful installation. Remember to always consult the manufacturer’s specific instructions for your Outer Shield roofing system.
The installation process generally follows these steps, but variations may exist depending on the specific Outer Shield product and your roof’s unique features. Always prioritize safety and follow all local building codes.
Necessary Tools and Equipment, Outer shield roofing
The right tools make the job easier and safer. Having everything prepared beforehand saves time and frustration. Here’s a list of common tools and equipment needed for Outer Shield roofing installation:
- Measuring tape
- Utility knife
- Safety glasses
- Work gloves
- Hammer
- Nail gun (recommended for efficiency)
- Ladder (appropriate for roof height)
- Caulk gun
- Level
- Metal shears (for cutting metal components, if applicable)
- Screwdrivers (various sizes)
- Safety harness and rope (for working at heights)
Step-by-Step Installation Guide
A typical Outer Shield roof installation involves several key stages. The exact steps will depend on the specific Outer Shield product being used, so always reference the manufacturer’s instructions. However, a general process might include:
- Preparation: This involves thoroughly cleaning the existing roof surface, removing any debris, and assessing the condition of the underlying structure. Any necessary repairs should be completed before starting the Outer Shield installation.
- Underlayment Installation (if required): Some Outer Shield systems may require an underlayment to provide additional protection and waterproofing. This step involves carefully laying and securing the underlayment according to the manufacturer’s specifications.
- Outer Shield Panel Installation: This is the main part of the installation, involving carefully positioning and securing the Outer Shield panels to the roof. This usually involves using nails or screws, ensuring proper overlap and alignment for water tightness.
- Flashing and Sealing: Proper flashing around chimneys, vents, and other roof penetrations is crucial. Seal all seams and joints with appropriate sealant to prevent leaks.
- Final Inspection: Once the installation is complete, a thorough inspection is necessary to ensure all panels are properly secured, all seams are sealed, and there are no gaps or vulnerabilities.
Best Practices for Outer Shield Roof Installation
Following these best practices will significantly enhance the longevity and performance of your Outer Shield roof.
Proper installation is paramount for maximizing the lifespan and performance of your Outer Shield roof. Paying attention to detail and adhering to best practices will ensure a secure and watertight installation.
- Accurate Measurements: Precise measurements are essential to ensure proper panel cutting and fitting, minimizing waste and maximizing efficiency.
- Consistent Overlap: Maintain consistent overlap between panels to prevent water penetration. The manufacturer’s instructions will specify the required overlap.
- Secure Fastening: Use the correct fasteners and ensure they are properly driven to secure the panels firmly to the roof structure.
- Proper Sealant Application: Use high-quality sealant and apply it generously to all seams and joints to create a waterproof seal.
- Weather Conditions: Avoid installing Outer Shield roofing in extreme weather conditions, such as heavy rain, snow, or high winds.
- Professional Installation (Recommended): While DIY is possible, professional installation is highly recommended to ensure the job is done correctly and to the highest standards, potentially saving you money in the long run by avoiding costly repairs.
Maintenance and Repair

Source: everythingexteriorroofing.com
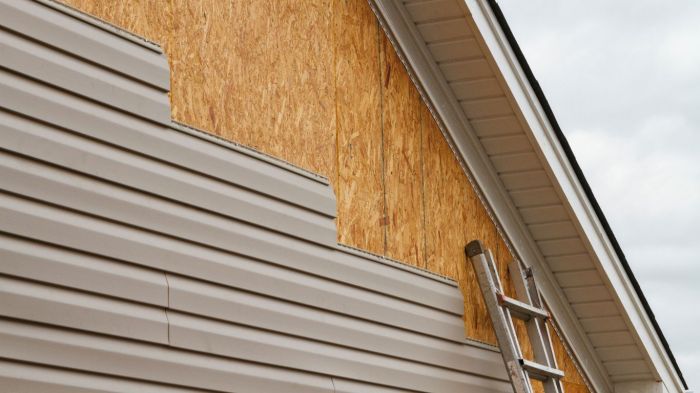
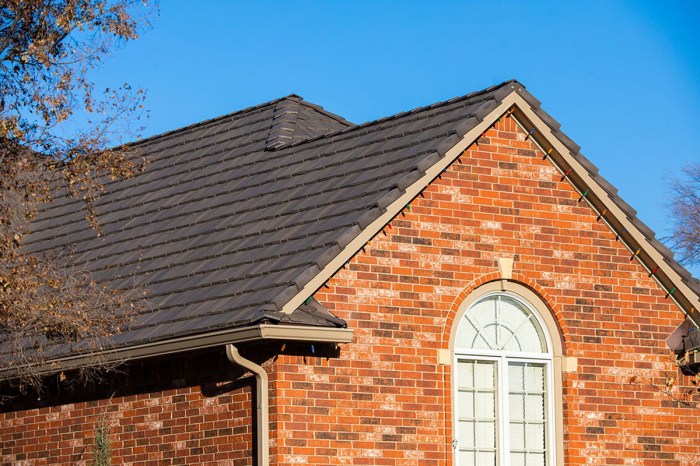
Outer Shield roofing, while durable, requires regular maintenance to ensure its longevity and optimal performance. Neglecting maintenance can lead to premature wear and tear, potentially resulting in costly repairs down the line. A proactive approach to maintenance will safeguard your investment and keep your roof looking its best for years to come.
Recommended Maintenance Schedule
A simple annual inspection is crucial. During this inspection, you should check for any signs of damage, such as loose or missing shingles, cracks, or discoloration. Additionally, inspect the flashing around chimneys, vents, and skylights for any signs of deterioration. Cleaning gutters and downspouts of debris is also a vital part of annual maintenance, preventing water damage. Every three to five years, consider a more thorough inspection, potentially involving a professional roofer, to address any potential issues before they become major problems. For areas with extreme weather conditions, such as heavy snowfall or intense sun exposure, more frequent inspections may be necessary.
Common Problems and Solutions
Several common issues can arise with Outer Shield roofing, but many are easily addressed. For instance, algae growth is a common aesthetic problem, easily solved with a specialized roof cleaning solution. Minor leaks, often stemming from damaged flashing or improperly sealed seams, can be repaired with appropriate sealant. Loose or damaged shingles are another common problem, typically requiring replacement. For more significant issues, such as extensive damage from a storm or significant wear and tear, professional assistance is recommended.
DIY Repairs
Homeowners can tackle some minor Outer Shield roofing repairs themselves. The following table illustrates some common problems, their solutions, necessary tools, and difficulty levels. Remember, safety is paramount. If you’re uncomfortable performing any repair, consult a professional roofer.
| Problem | Solution | Tools Needed | Difficulty Level |
|---|---|---|---|
| Missing Shingle | Replace the missing shingle with a matching one, ensuring proper sealing with roofing cement. | Replacement shingle, roofing cement, putty knife, utility knife | Easy |
| Minor Crack in Shingle | Apply a high-quality roofing sealant to the crack to prevent water penetration. | Roofing sealant, brush, or caulking gun | Easy |
| Loose Flashing | Tighten loose screws or replace damaged flashing with new flashing material, ensuring proper sealing. | Screwdriver, new flashing material (if needed), roofing cement | Medium |
| Algae Growth | Clean the roof using a specialized roof cleaning solution designed to remove algae and prevent future growth. Always follow the manufacturer’s instructions. | Roof cleaning solution, garden sprayer, safety harness (recommended for steep roofs) | Medium |
Cost and Budgeting

Source: everythingexteriorroofing.com
Getting a new roof is a significant investment, and understanding the cost of Outer Shield roofing is crucial for proper budgeting. Several factors influence the final price, making it important to get detailed quotes from reputable installers. This section will break down those factors and provide some cost examples to help you plan.
The overall cost of Outer Shield roofing is determined by a combination of factors. These include the size and complexity of your roof, the materials used, labor costs in your region, and any necessary repairs or additional work required before installation. The type of Outer Shield system chosen (e.g., different membrane options, underlayment choices) will also affect the final price. Additionally, permits and inspections can add to the total expense. Unexpected issues, like significant roof damage discovered during the process, can also increase the cost.
Factors Influencing Outer Shield Roofing Costs
Several key elements contribute to the overall cost. Material costs, including the Outer Shield membrane, underlayment, fasteners, and flashing, make up a substantial portion. Labor costs, which vary significantly by location and installer expertise, represent another major expense. The size and pitch of your roof directly impact both material and labor needs. More complex roof designs, requiring specialized techniques or extra materials, will increase the overall price. Finally, any pre-existing roof damage needing repair before installation adds extra cost.
Typical Cost Ranges for Outer Shield Roofing Installations
Providing exact pricing is impossible without a detailed assessment of a specific project. However, we can offer some general cost ranges based on average project sizes and regional variations. For a small to medium-sized residential roof (approximately 1,500-2,500 square feet), the total cost could range from $15,000 to $30,000. Larger, more complex roofs or those requiring extensive repairs might exceed $30,000. These figures are estimates and can vary significantly based on the previously mentioned factors. Remember to obtain multiple quotes from different contractors to get a better understanding of pricing in your specific area.
Sample Budget for Outer Shield Roofing Installation
This sample budget illustrates a potential breakdown of costs for a medium-sized residential roof (2,000 square feet) in a mid-range cost area. Remember, this is just an example, and your actual costs may differ.
| Item | Cost |
|---|---|
| Materials (Outer Shield membrane, underlayment, fasteners, flashing) | $8,000 – $12,000 |
| Labor (teardowns, installation, cleanup) | $7,000 – $10,000 |
| Permits and Inspections | $500 – $1,000 |
| Contingency (for unexpected issues) | $1,000 – $2,000 |
| Total Estimated Cost | $16,500 – $25,000 |
Remember to always obtain multiple quotes from reputable contractors before making a decision. Compare not only the price but also the experience, warranty, and reputation of each contractor.
Warranty and Guarantees: Outer Shield Roofing
Source: peakperformanceroofing.ca
Outer Shield roofing systems come with warranties designed to protect your investment and provide peace of mind. Understanding the specifics of your warranty is crucial, as it Articulates the manufacturer’s commitment to the quality and longevity of their product. This section details what’s covered, how to file a claim, and any potential limitations.
The exact terms and conditions of your Outer Shield roofing warranty will depend on the specific product purchased and the manufacturer. However, most warranties cover defects in materials and workmanship for a specified period. This typically includes issues like leaks, cracking, and delamination. It’s important to carefully read the warranty document provided with your purchase, as it’s a legally binding agreement.
Warranty Coverage
Outer Shield roofing warranties generally cover defects that are directly attributable to the manufacturing process or the quality of the materials used. This typically excludes damage caused by external factors like severe weather events (unless specifically stated otherwise), improper installation (by someone other than a certified installer), or normal wear and tear. For example, a warranty might cover a manufacturing defect that causes a panel to crack prematurely, but it would likely not cover damage from a falling tree branch. The length of coverage varies depending on the specific product and manufacturer, ranging from several years to decades for certain components.
Filing a Warranty Claim
The process for filing a warranty claim usually involves contacting the manufacturer directly or their authorized representative. You will typically need to provide proof of purchase, detailed information about the damage, and potentially photographs or videos documenting the issue. The manufacturer will then assess the claim and determine if it falls under the terms of the warranty. They may send an inspector to evaluate the damage before approving any repairs or replacements. It’s important to maintain good records and communicate clearly with the manufacturer throughout the process.
Warranty Limitations and Exclusions
It’s important to understand that most warranties have limitations and exclusions. Common exclusions include damage caused by acts of God (e.g., hurricanes, tornadoes), improper maintenance, vandalism, or normal wear and tear. For example, minor fading or discoloration due to sun exposure is usually not covered. Additionally, some warranties may have limitations on the type of repairs or replacements offered. For instance, the manufacturer might only replace defective components rather than the entire roof. Always carefully review the fine print of your specific warranty document to understand what is and isn’t covered.
Environmental Impact
Source: eatonroofing.com
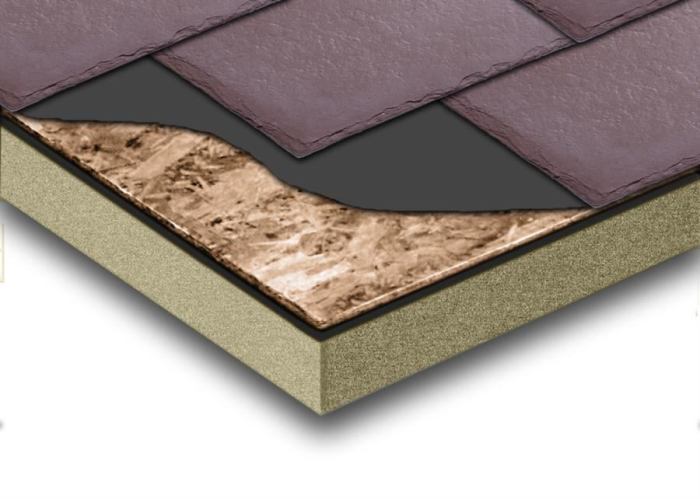
Choosing a roofing material involves more than just aesthetics and durability; it also has significant environmental implications. Understanding the life-cycle impact of Outer Shield roofing, from manufacturing to disposal, is crucial for making an informed decision. This section details the environmental footprint of Outer Shield roofing, comparing it to other common roofing materials and highlighting its sustainability features.
Outer Shield Roofing’s environmental impact is multifaceted, encompassing the energy used in manufacturing, the transportation of materials, the potential for pollution during installation, and ultimately, its end-of-life management. The manufacturing process utilizes primarily recycled materials, minimizing the need for virgin resources and reducing greenhouse gas emissions compared to some traditional roofing options. However, the energy required for production and transportation remains a factor that needs consideration.
Manufacturing and Installation Emissions
The manufacturing of Outer Shield roofing components involves processes that generate greenhouse gases. These emissions are largely associated with energy consumption in the production of the base materials and the subsequent fabrication processes. While Outer Shield strives to minimize these emissions through efficient manufacturing techniques and the use of renewable energy sources where feasible, the exact figures vary depending on the specific manufacturing facility and the energy mix used in its operations. Similarly, the transportation of materials from the manufacturing plant to the installation site contributes to the overall carbon footprint. The distance covered and the mode of transportation (truck versus rail, for example) will influence the magnitude of these emissions. The installation itself may generate minor amounts of waste, primarily packaging materials, but proper waste management practices minimize this impact.
Comparison with Other Roofing Materials
Compared to asphalt shingles, a common roofing material, Outer Shield roofing generally demonstrates a smaller environmental footprint over its lifespan. Asphalt shingle production is energy-intensive and relies heavily on petroleum-based materials, contributing significantly to greenhouse gas emissions. Conversely, Outer Shield’s utilization of recycled content reduces the demand for virgin resources and associated emissions. Similarly, when compared to clay or concrete tiles, which are heavy and require significant energy for transportation and installation, Outer Shield offers a more environmentally friendly alternative due to its lighter weight and potentially lower transportation emissions. The specific environmental advantage varies based on geographical location and transportation distances involved.
Recyclability and Sustainability
Outer Shield roofing components are designed with recyclability in mind. Many of the constituent materials can be separated and recycled at the end of the roof’s lifespan, reducing the amount of waste sent to landfills. While the precise recyclability rates depend on local recycling infrastructure and processing capabilities, Outer Shield actively promotes responsible disposal and recycling programs to maximize the environmental benefits of its product. The use of recycled content in the manufacturing process itself also contributes to a circular economy model, further reducing the environmental impact. For example, a significant portion of the composite material used in Outer Shield roofing is derived from post-consumer recycled plastics, diverting waste from landfills and reducing reliance on virgin materials.
Aesthetic Considerations
Source: vandaliaroofingcontractors.com
Outer Shield roofing offers a surprisingly diverse range of aesthetic options, allowing you to seamlessly integrate superior protection with your home’s unique style. The versatility of the material allows for a wide variety of colors and profiles, ensuring there’s a perfect Outer Shield solution to complement any architectural design.
Choosing the right roofing material is a significant design decision, impacting your home’s curb appeal and overall aesthetic. Outer Shield understands this, providing options that go beyond mere functionality.
Available Styles and Colors
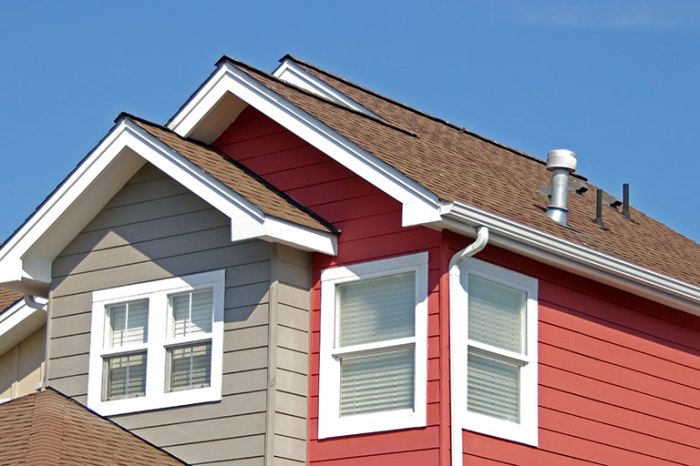
Outer Shield roofing comes in a variety of styles and colors designed to match different tastes and architectural styles. The color palette ranges from classic earth tones like deep browns and charcoal grays to more vibrant options such as deep blues and reds. The profiles themselves vary, offering choices that mimic traditional shingle styles, sleek contemporary designs, or even more rustic, textured appearances. This breadth of options allows for a customized look that complements your home’s existing features and personal preferences. Think of the subtle shimmer of a slate-gray roof catching the afternoon sun, or the rich, warm tones of a terracotta roof blending seamlessly with brickwork.
Outer Shield Roofing and Architectural Styles
The adaptability of Outer Shield roofing makes it a perfect choice for a wide array of architectural styles. Its versatility allows for seamless integration, enhancing rather than clashing with the existing design. For example, a traditional shingle-style Outer Shield roof can perfectly complement a classic colonial home, while a more modern, sleek profile can add a contemporary edge to a minimalist design. The color selection further enhances this adaptability, with neutral tones providing a timeless appeal and bolder colors offering a striking focal point.
Visual Descriptions of Outer Shield Roofing on Different House Types
Imagine a ranch-style home, low-slung and sprawling, topped with a rich, dark brown Outer Shield roof. The deep color grounds the structure, emphasizing its horizontal lines and creating a sense of solidity and warmth. Now picture a stately colonial home, its symmetrical facade accentuated by a charcoal gray Outer Shield roof with subtle texture. The elegant profile complements the home’s classic lines, creating a sophisticated and timeless appearance. Finally, envision a Victorian home, its intricate details and ornate gables highlighted by a deep red Outer Shield roof. The vibrant color adds a touch of boldness and character, drawing the eye upward and emphasizing the home’s unique architectural features. Each application demonstrates the material’s ability to enhance, rather than detract from, the overall architectural design.
Choosing a Contractor

Source: multiscreensite.com
Choosing the right contractor is crucial for a successful Outer Shield roofing installation. A qualified contractor ensures proper installation, adherence to warranty requirements, and a long-lasting, high-quality roof. Selecting the wrong contractor can lead to costly repairs, compromised performance, and significant headaches. This section will guide you through the process of finding and evaluating contractors for your Outer Shield roofing project.
Contractor Qualification Checklist
Before contacting any contractor, it’s beneficial to have a list of essential questions prepared. These questions will help you assess their experience, qualifications, and suitability for your project. This will help streamline the selection process and ensure you’re working with a professional who meets your needs.
- Verify the contractor’s license and insurance coverage, including workers’ compensation insurance.
- Inquire about their experience with Outer Shield roofing systems specifically, including the number of similar projects completed.
- Request references from past clients and follow up on those references to assess their satisfaction with the contractor’s work and professionalism.
- Ask about the contractor’s warranty and guarantee offerings, ensuring they align with Outer Shield’s manufacturer warranty.
- Determine the contractor’s project management process, including timelines, communication protocols, and permit acquisition procedures.
- Clarify the contractor’s payment schedule and payment terms to avoid unexpected financial burdens.
- Confirm whether the contractor employs their installation crew or subcontracts the work, and inquire about the qualifications of their installers.
Selecting a Reputable Contractor
The process of selecting a qualified contractor involves several key steps. Taking a systematic approach will increase your chances of choosing a contractor who will deliver high-quality work and meet your expectations. This will minimize the risks associated with selecting an unqualified or unreliable contractor.
- Begin by compiling a list of potential contractors through referrals, online searches, and industry associations.
- Conduct thorough background checks on each contractor, verifying their licensing, insurance, and business registration status.
- Carefully review online reviews and testimonials to gain insight into past client experiences and identify any potential red flags.
- Narrow down your list of potential contractors based on their qualifications, experience, and client feedback.
- Schedule in-person meetings or virtual consultations with your top choices to discuss your project requirements in detail.
- Request detailed proposals outlining the scope of work, materials, timelines, and pricing for each contractor.
Evaluating Contractor Bids and Proposals
Once you have received bids and proposals from multiple contractors, it’s essential to evaluate them carefully before making a decision. This involves comparing not only the price but also the scope of work, materials used, and other crucial factors. This thorough evaluation will ensure you select the most cost-effective and high-quality option.
A comparative table can be helpful:
| Contractor | Price | Scope of Work | Materials | Timeline | Warranty | References |
|---|---|---|---|---|---|---|
| Contractor A | $X | Detailed description | Specific materials | Timeline | Warranty details | Contact information |
| Contractor B | $Y | Detailed description | Specific materials | Timeline | Warranty details | Contact information |
| Contractor C | $Z | Detailed description | Specific materials | Timeline | Warranty details | Contact information |
Remember that the lowest bid isn’t always the best option. Consider the overall value offered by each contractor, including their experience, reputation, and the quality of materials they intend to use. A slightly higher bid from a reputable contractor with a strong track record might be a more worthwhile investment in the long run.
Last Point

Source: oakcrestroofing.com
Ultimately, choosing the right roofing system is a crucial investment in your home’s longevity and value. Outer Shield roofing, with its robust features, diverse options, and relatively low maintenance requirements, presents a strong contender. By understanding the installation process, maintenance schedule, and cost considerations, you can make an informed decision that aligns perfectly with your needs and budget. Remember to always consult with a qualified contractor to ensure a successful installation and enjoy the peace of mind that comes with a durable, long-lasting roof.